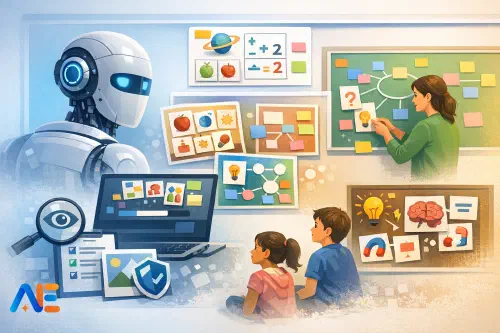
What displays are for
An inclusive classroom display is a teaching resource that reduces cognitive load, clarifies key ideas, and supports independent practice. It is not wallpaper, nor a reward for neat handwriting. The test is simple: if a pupil can use it to answer a question, fix an error, or explain a concept more clearly, it earns its space.
This matters for inclusion because displays can quietly exclude. Tiny fonts, busy borders, low-contrast colours, idiomatic examples, and unexplained symbols all create barriers. If you’re building a “minimum viable inclusion stack” for your room, displays are a high-leverage place to start because they sit there all day, supporting every learner. For a broader framing of inclusion-first routines, see Minimum viable inclusion stack.
The AI workflow
The most reliable way to use AI for displays is a teacher-led pipeline: brief → generate → verify → adapt → print, with explicit sign-off. AI is fast at drafting, reformatting, and producing variants; you remain responsible for accuracy, alignment, and appropriateness.
Start with a tight brief. Name the learning function (e.g., “support retrieval of key vocabulary for persuasive writing”), the audience (year group, EAL needs, reading age range), and the constraints (A3 portrait, black-and-white printable, dyslexia-friendly font, no copyrighted images). Then generate components, not a whole poster in one go: definitions, examples, non-examples, worked steps, common errors, and short retrieval questions.
Verification is not optional. Check factual accuracy, check that examples match your curriculum sequence, and check that the language is teachable in your context. If you want a structured “teacher-in-the-loop” approach, the micro-routines in AI lesson moves and planning template translate well to display design: draft, critique, refine, and only then publish.
Vocabulary walls that teach
A vocabulary wall becomes instructional when it does more than list words. AI can help you create Frayer-style entries that pupils can actually use: a definition in pupil-friendly language, key features, examples, and non-examples. The trick is to keep each entry tight enough to be read at a glance, while still giving pupils something they can apply in writing or problem-solving.
For morphology, ask AI to break words into prefixes, roots, and suffixes, and to generate “word family” links that you can validate. For instance, a science wall might connect photosynthesis to photo- (light) and synth- (put together), then add synthesis, synthetic, synthesise. Add one sentence frame pupils can borrow (“Photosynthesis is the process where…”) and one contrast frame (“Unlike respiration, photosynthesis…”). For EAL-friendly support, include a plain-language paraphrase, a concrete example anchored in classroom experience, and—where helpful—an agreed symbol or simple sketch.
To stop vocabulary walls becoming stale, build in spaced ‘refresh’ prompts. A small “Today’s revisit” strip can rotate three questions: “Use it in a sentence”, “Spot the non-example”, and “Explain it to a younger pupil”. AI is excellent at generating these prompts at multiple difficulty levels, but you should remove any that rely on cultural references or ambiguous contexts.
Worked examples + dual coding
Worked examples are one of the most display-friendly tools we have, especially when they are dual-coded: concise text paired with a simple diagram, flow, or annotated representation. AI can turn your existing solutions into teachable steps by rewriting them with numbered reasoning, highlighting decision points, and adding a short “why this step matters” note.
A practical pattern is the “full → faded → independent” trio. You display the complete worked example, then a fade-out version where key steps are blanked (so pupils can rehearse them), then a near-blank scaffold for independent practice. AI can generate the faded variants quickly, but you must decide which steps to fade based on where your pupils typically stumble.
Common-error callouts are where displays start improving learning, not just supporting it. Add a small box: “Common mistake: … / Fix: … / Check: …”. If you want a deeper approach to worked examples and reasoning transparency, Extended thinking for worked examples offers a useful structure you can adapt to poster form, keeping the final pupil-facing version clear and uncluttered.
Retrieval boards that run themselves
A retrieval board works best when it is routine-driven. AI can generate daily and weekly question sets aligned to your current unit, but the board “runs itself” only if pupils know the reveal routine. For example, you might post three daily questions: one from the last lesson, one from last week, and one from the last half-term. Pupils answer on mini whiteboards, then you reveal answers using a flap, overlay, or QR link to a teacher-checked key.
Interleaving is easier with AI, provided you constrain it. Tell it exactly which topics to draw from and what to avoid. A maths retrieval board might interleave fraction equivalence, angle facts, and ratio tables; a humanities board might interleave chronology, key terms, and source inference stems. Keep the questions short, and include at least one “explain your choice” item each week to prevent retrieval becoming pure guessing.
If you teach younger pupils, you can still do retrieval boards—just make them more oral and visual. Use picture prompts, sentence stems, and one-step questions. The safe, classroom-ready routines in Teacher-in-the-loop AI playbook can help you keep retrieval age-appropriate without turning it into a worksheet wall.
Misconception corners
A misconception corner is a “live” display: it changes as learning reveals new errors. AI can help you draft diagnostic questions (“Which answer is correct, and why?”), plausible distractors, and short fix-it explanations. The value is not in catching pupils out; it is in normalising error correction as part of learning.
A strong format is: misconception statement → quick diagnostic → fix-it explanation → self-check. For example, in language learning you might address false friends; in science, confusing mass and weight; in literature, mixing up narrator and author. Ask AI to produce three versions of the diagnostic: one multiple choice, one “spot the mistake”, and one short explanation prompt. Then you choose the version that best matches your class’s confidence and reading level.
Discover the power of Automated Education by joining out community of educators who are reclaiming their time whilst enriching their classrooms. With our intuitive platform, you can automate administrative tasks, personalise student learning, and engage with your class like never before.
Don’t let administrative tasks overshadow your passion for teaching. Sign up today and transform your educational environment with Automated Education.
🎓 Register for FREE!
Accessibility QA checklist
Before you print, run a quick QA check that treats accessibility as a design constraint, not an add-on. You do not need specialist software; you need consistent habits. Use a dyslexia-friendly font (or at least avoid overly decorative fonts), keep line length reasonable, and prioritise clear spacing. Avoid dense paragraphs on posters; aim for short chunks with meaningful headings.
Colour and contrast matter more than style. If you print in colour, ensure the display still works in greyscale. Use colour to encode meaning consistently (e.g., definitions in one colour, examples in another), not to decorate borders. Check that any icons are explained and used consistently, and that the language level matches your pupils. If you support AAC or symbol communication, ensure symbols are accurate and not culturally loaded.
For a broader look at how schools are consolidating accessibility practice with technology, Accessibility tech consolidation guide is a helpful companion—especially if you’re trying to standardise approaches across classrooms.
Copyright and image safety
A classroom display is still a published artefact, even if it stays within your walls. Build a copyright-safe image pipeline so you’re not relying on “whatever comes up on search”. Start by sourcing from reputable libraries with clear licensing, saving the licence details alongside the image file. If attribution is required, include it discreetly in a footer strip or on a teacher copy stored digitally.
When you use generated visuals, be intentional. AI-generated images can be useful for generic diagrams (a simplified cell, a neutral scene for a story prompt) but are risky for anything that should be historically accurate, culturally specific, or medically precise. They can also introduce bias in who is represented and how. If you are unsure, use your own simple diagrams, public domain sources, or licensed repositories instead. Media literacy and safety considerations are explored further in Classroom reality check on AI media, which is worth reading if pupils will also be creating visuals.
Prompt pack
Good prompts produce components you can verify and lay out cleanly. Keep them short, specify the audience, and demand outputs that are print-ready. Here are copy-and-adapt options.
Use this for a vocabulary wall entry: “Create a Frayer-style vocabulary card for ‘[term]’ for learners aged [age], including a pupil-friendly definition (max 18 words), three key features, two examples, one non-example, a sentence stem, and a morphology breakdown. Avoid idioms. Reading age: [level].”
Use this for morphology and EAL support: “For the term ‘[term]’, generate a word family list, common collocations, and two classroom-based examples that do not rely on cultural references. Include a plain-language paraphrase.”
Use this for a worked example poster: “Turn this solution into a six-step worked example with a brief reason for each step (max 10 words per reason). Then create a faded version with steps 2, 4, and 6 blanked. Add three common errors with fixes.”
Use this for retrieval boards: “Create 12 retrieval questions: 4 from last lesson [topic], 4 from last week [topic], 4 from last half-term [topic]. Mix formats (short answer, multiple choice, explain). Provide answers separately. Keep each question under 18 words.”
Use this for misconception corners: “List five common misconceptions for [topic]. For each, write a diagnostic question, the correct answer, a short fix-it explanation (max 40 words), and a self-check question.”
Finally, a department template prompt helps consistency: “Using our agreed style guide (font, colours, symbol set), produce a one-page display spec for [unit], including: key vocabulary list, two worked examples, retrieval schedule, and misconception list. Output as headings and copy blocks ready for layout.”
Quality gates
AI speeds up drafting, but quality comes from gates you apply every time. Run hallucination checks by verifying facts against your trusted sources and your scheme of learning. Run bias checks by scanning examples, names, contexts, and images for narrow representation or stereotypes. Run curriculum alignment checks by ensuring the display uses your taught methods and terminology, not an AI’s generic preference. If you are working in a team, decide what must be standardised (key definitions, method steps) and what can vary (examples, contexts).
A practical “10-minute refresh routine” each half-term keeps displays alive without becoming another workload sink. Spend two minutes reviewing what pupils misunderstood, three minutes updating one misconception and one retrieval set, three minutes swapping in two refreshed vocabulary prompts, and two minutes checking print clarity and contrast. Small, scheduled updates beat big redesigns.
May your displays do more teaching than tidying.
The Automated Education Team